HyperRear2+ 159g
World cup proven by some of the fastest athletes of the planet.
Durable, precise and incredibly light: no shortcuts to reduce weight.
The overall hub system employs bigger bearings than most competitors:
freehub mounts 2 corrosion resistant stainless bearings (6803-2rs), hubshell rotates on 2 "heavy duty"
corrosion resistant stainless bearings (6903-2rs) that can handle 250kg each in the worst static condition
Bigger bearings are mounted onto axles of a bigger diameter. This creates a stiffer assembly that significantly increases bearing durability
Our MTB hubs feature also additional external seals to keep moisture and dust far from the 2RS bearing seals
After 3 years of internal testing and 2 years of Open-Program tests we finally released the new 60 P.O.E. freehub/floating ring mechanism
It further enhances engagement quickness, increases overall lifespan and simplifyes maintenance
Specifically designed long-life polyurethane lip seal protects the freewheel mechanism
This external bearing preload device is very easy to set and integrates also an additional external Soft-Touch o-ring seal
Micro-tuner ensures a very precise hub bearing setting, low bearing friction, higher bearing durability and no play at the rim
Straight pull spokes increase wheel stiffness, reducing lateral flex and increasing reactivity of torque transmission
All this with a weight reduction too!
Tech info
Description
Race-proof hyper-engineered rear disc hub.
ABI Stainless cartridge bearings with high load capacity & low friction RS seals plus external O-ring seals.
Oversized 17mm axle with external micro- tuner.
36-48-60p.o.e. front-engagement freewheel with long-life polyurethane lip-seal.
Black anodized body with laser etched graphics.
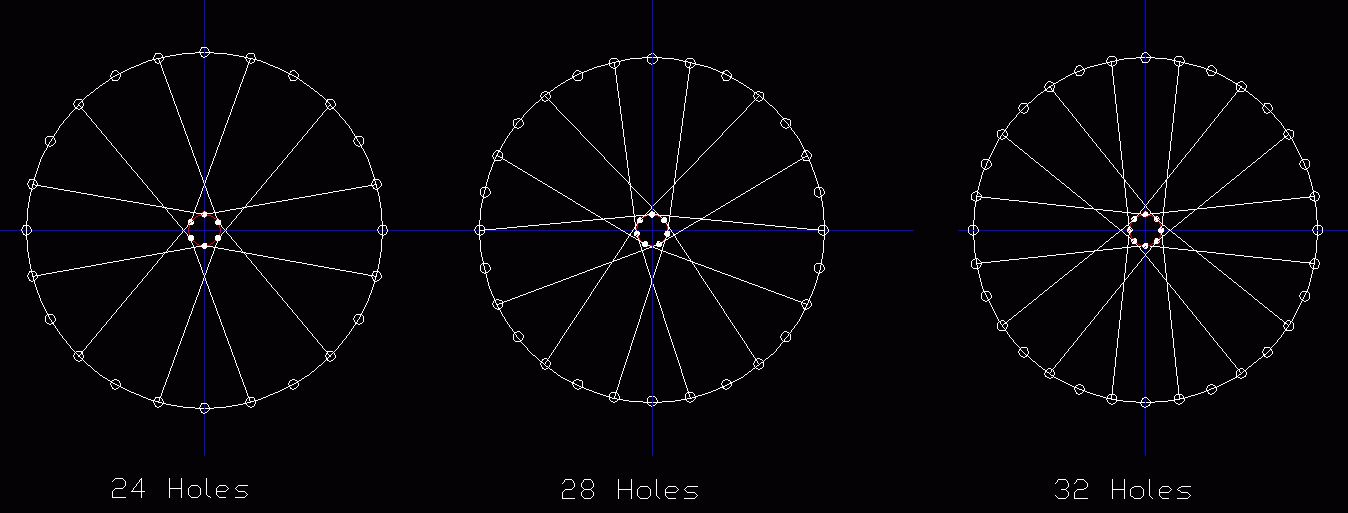
Flanges for straight-pull d/b spokes: 32h
Hub Dimensions
Tech tips
Hyper "2 & 2+" hubs (This hub family includes "HyperBoost" "HyperRear2 & 2+" "HyperCamber2 & 2+" "HyperJR" )
Hyper hubs have been long-term tested in the wet environment of north Europe from the start.
For over a decade we have constantly developed and refined each single detail of our Hyper hubs.
Properly maintained hubsets reach a very remarkable lifespan, read below how to.
Start-up and Breaking-in
Remind to check the Micro-Tuner is properly tuned before the first ride. All hubs are pre-tuned at the factory assembly but consider that after the rim lacing and the wheel installation with cogs and disc on the bike chances are that the Micro-Tuner get unitentionally mis-placed.
To properly set upthe Micro-Tuner position just follow the Bearing-Preload instructions on the hub manual with the wheel on the bike.
As start please ride the hub for 4-8 hours at mild intensity (coasting reduces the break-in time) to allow the first breaking-in of the moving parts.
This will allow the correct "smoothing" of the moving surfaces just like on other hi-precision mechanisms ie thermic engines.
Never spray-wash hubs in general (any model of any brand).
Avoid high-pressure washing directly onto freewheel, even the best lip-seals aren't capable to resist to hi-frequency water spray.
When water-moisture get inside the hub mechanism it carries dirt particles too, these can quickly damage the internal hub parts.
The amount of wear depends on the quantity of dirt laying inside, the mileage, and how abrasive are the dirt fine particles.
These 3 factors combined can bring to a premature wear of bearings, hub-shell splines and freehub mechanism.
"Hyper" hubs bearings
All models of "Hyper" hub family feature unique external O-ring seals for an additional protection of the bearing seals and are standard equipped with Enduro 440 stainless bearings that do not suffer for oxidation-corrosion. In clean conditions good bearings can last for 30-40.000 Km, however in the mtb riding environment water can get in bringing fine abrasive dirt particles with it.
For the reason described above the wear of metal races and balls directly depends to the type and amount of dirt that get inside the races.
All models can be ordered with optional super-high grade steel and non-corrodable Ceramic bearings for reduced friction and longer lifespan: HyperCeramic or Enduro XD-15.
"Hyper" hubs Servicing / Frequent Errors
We warmly recommend to learn the basics about our MTB engagement system from the start in order to ensure an extended durability of your hub.
Hyper freehub mechanism works in a far different way than other front-engagement hubs you may already know (ChrisKing / DT / others).
Never wrench on Hyper hubs by instinct or past experience but read manuals and strictly follow the instructions step by step (don't skip any step).
Understanding "Hyper" freehub principle is extremely important.
HyperRear freehub function is fully based on the velocity of "Floating-Ring" movement.
"Floating-Ring" movement should happen instantly ( one millisecond only) and this dictates the servicing rules you find on our manuals.
Once few engagement teeth got damaged by a slow / un-free movement of the Floating Ring the entire freewheel assembly must be replaced.
Avoid the following errors that will seriously damage the hub internal parts (immediately or in a very short time):
- Too much grease.
- Uncorrect positioning of grease. Never apply grease on hub-shell splines (oil them only).
- Wrong grease type (Lithium grease is one of the most dangerous).
- Micro Tuner way off its correct position (this increases also the clearance between the engagement teeth)
Regularly service your Hyper hub strictly following its instruction manual step by step (don't skip any step).
Again: never wrench or service Extralite hubs by instinct or only by past experience!
Old and new parts
As you see the first signs of wear we warmly recommend to install a new Floating Ring, it will help to prevent wear of hubshell splines.
All "2" hub models are ready to fit the newer "2+" Floating Ring that employs all the 24 hubshell splines simultaneously.
Never install a worn-out Floating Ring in a still good hubshell, it will quickly damage and wear the hubshell splines!
Hubshell Splines - Potential risk
When riding with dirt inside the freewheel mechanism the hard particles of sand will badly grind the hubshell splines.
As the "floating ring" doesn't move well and instantly a freewheel mis-engagement can permanently damages the freewheel parts.
In this case replacing "floating ring" and/or "Freewheel body" does not solve.
See this example of badly worn-out hubshell splines that need an expensive hub-shell replacement (or eventually sent back for re-sharpening).
Opening "Rear Axle-Ends" on Thru-axle models
Use only two 17mm closed wrenches.
Feel free to ask for additional tech info, we'll be happy to help!
Lacing
Wheel building instructions for
HyperFront - HyperLefty - HyperLefty2 - HyperBoost F
HyperRear - HyperRear2 - HyperCamber - HyperBoost R
Here you find all the necessary instructions to build up your dream wheels with pre-calculated spoke lengths.
Follow instruction step by step:
1) Measure your "spoke-end diameter"
2) Find your front spoke length on table A & B
3) Find your rear spoke length on table C or D
4) See specific notes about spoke and rim types
5) Follow correct lacing patterns
Rim offset:
2-3mm of rim offset influences the spoke length for an average 0.3mm only.
You may neglect it or eventually use that tiny amount just for rounding lengths to the available spoke size.
Maximum spoke tension:
Refer to manuals
Warning: spoke lacing and tensioning require skills and experience, refer to an expert professional wheel builder for these operations.
1
"Spoke-End Diameter"
Rim manufacturers offer ERD figures however we warmly recommend to precisely measure the rim+nipple combination.
A truly correct spoke calculation requires exact "spoke-end diameter" and rim drilling (not ERD).
Spoke-End Diameter depends on your rim internal diameter and nipple type too.
2
HyperFront - HyperLefty - HyperLefty2 - Hyper Boost F
Disc side: Tangential Crossing (see sketch below) - Straight-pull spokes - All measures in mm
Table A
|
Spoke-end
Diameter |
Spoke Length
24H |
Spoke Length
28H |
Spoke Length
32H |
|
26' - 27.5' - 29' Rims
|
|||
|
515
|
254-255
|
261-262
|
256-257
|
|
520
|
257
|
264
|
259
|
|
525
|
259-260
|
266-267
|
261
|
|
530
|
262
|
269
|
264
|
|
535
|
264-265
|
271-272
|
266
|
|
540
|
267
|
274
|
269
|
|
545
|
269-270
|
276-277
|
271
|
|
550 |
272
|
279
|
274
|
|
555
|
274-275
|
281-282
|
276
|
|
560
|
277
|
284
|
279
|
|
565
|
278-279
|
286-287
|
281
|
|
570
|
281
|
289
|
283-284
|
|
575
|
283-284
|
291-292
|
286
|
|
580
|
287
|
294
|
288-289
|
|
585
|
289-290
|
296
|
291
|
|
590
|
292
|
298-299
|
293-294
|
|
595
|
294-295
|
301
|
296
|
|
600
|
297
|
303-304
|
298-299
|
|
605
|
299
|
306
|
301
|
|
610
|
302
|
308-309
|
303-304
|
|
615
|
303-304
|
311
|
306
|
|
620
|
306
|
313-314
|
308-309
|
Table A
Note: We list "spoke-end diameters" every 5mm step. If your "spoke-end diameter" measure is in between 2 steps adjust your spoke length consequently.
HyperFront - HyperLefty - HyperLefty2 - Hyper Boost F
Radial on Right side - Straight-pull spokes - Any drilling - All measures in mm
Table B
|
Spoke-end Diameter
|
Spoke Length
|
|
26' - 27.5' - 29' Rims
|
|
|
515
|
244
|
|
520
|
246-247
|
|
525
|
249
|
|
530
|
251-252
|
|
535
|
254
|
|
540
|
256-257
|
|
545
|
259
|
|
550 |
261-262
|
|
555
|
264
|
|
560
|
266-267
|
|
565
|
269
|
|
570
|
271-272
|
|
575
|
274
|
|
580
|
276-277
|
|
585
|
279
|
|
590
|
281-282
|
|
595
|
284
|
|
600
|
286
|
|
605
|
289
|
|
610
|
291
|
|
615
|
294
|
|
620
|
296
|
Table B
Note: We list "spoke-end diameters" every 5mm step. If your "spoke-end diameter" measure is in between 2 steps adjust your spoke length consequently.
IMPORTANT NOTE: on the Right flange Berd spokes should be always mounted without "Tangential Straightpull Inserts", that's due for bearing fitting clearance.
3
HyperRear - HyperRear2 - HyperBoost R
Drive and Disc sides: Tangential Crossing (see sketch below) - Straight-pull spokes - All measures in mm
Table C
|
Spoke-end
Diameter |
Spoke Length
24H |
Spoke Length
28H |
Spoke Length
32H |
|
26' - 27.5' - 29' Rims
|
|||
|
515
|
254-255
|
261-262
|
256-257
|
|
520
|
257
|
264
|
259
|
|
525
|
259-260
|
266-267
|
261
|
|
530
|
262
|
269
|
264
|
|
535
|
264-265
|
271-272
|
266
|
|
540
|
267
|
274
|
269
|
|
545
|
269-270
|
276-277
|
271
|
|
550 |
272
|
279
|
274
|
|
555
|
274-275
|
281-282
|
276
|
|
560
|
277
|
284
|
279
|
|
565
|
278-279
|
286-287
|
281
|
|
570
|
281
|
289
|
283-284
|
|
575
|
283-284
|
291-292
|
286
|
|
580
|
287
|
294
|
288-289
|
|
585
|
289-290
|
296
|
291
|
|
590
|
292
|
298-299
|
293-294
|
|
595
|
294-295
|
301
|
296
|
|
600
|
297
|
303-304
|
298-299
|
|
605
|
299
|
306
|
301
|
|
610
|
302
|
308-309
|
303-304
|
|
615
|
303-304
|
311
|
306
|
|
620
|
306
|
313-314
|
308-309
|
Table C
Note: We list "spoke-end diameters" every 5mm step. If your "spoke-end diameter" measure is in between 2 steps adjust your spoke length consequently.
HyperCamber - HyperCamber2
Drive and Disc sides: Tangential Crossing (see sketch below) - Straight-pull spokes - All measures in mm
Table D
|
Spoke-end
Diameter |
Spoke Length
32H Drive side |
Spoke Length
32H Disc Side |
|
26' - 27.5' - 29' Rims
|
||
|
515
|
254-255
|
256-257
|
|
520
|
257
|
259
|
|
525
|
259
|
261
|
|
530
|
262
|
264
|
|
535
|
264
|
266
|
|
540
|
267
|
269
|
|
545
|
269
|
271
|
|
550 |
272
|
274
|
|
555
|
274
|
276
|
|
560
|
277
|
279
|
|
565
|
279
|
281
|
|
570
|
281-282
|
283-284
|
|
575
|
284
|
286
|
|
580
|
286-287
|
288-289
|
|
585
|
289
|
291
|
|
590
|
291-292
|
293-294
|
|
595
|
294
|
296
|
|
600
|
296-297
|
298-299
|
|
605
|
299
|
301
|
|
610
|
301-302
|
303-304
|
|
615
|
304
|
306
|
|
620
|
306-307
|
308-309
|
Table D
Note: We list "spoke-end diameters" every 5mm step. If your "spoke-end diameter" measure is in between 2 steps adjust your spoke length consequently.
4
Important Notes
Rims: We consider rims with 2-4mm of offset.
In case of symmetric rims you may add 1mm to front-right and rear-left sides.
Steel Spokes: Flanges accept standard spoke heads however we recommend to use only high quality butted spokes.
Butted spokes are lighter and allow a better spoke aligningment that translates in a reduced stress of the parts and an overall stiffer lacing.
Berd spokes: Flanges are designed to properly fit Berd spokes.
All edges are well rounded thereafter "Tangential Straightpull Inserts" are not necessary.
Consequently adjust Table A lenghts as follows:
- subtract 2mm from Table values if "Without Tangential Straightpull Inserts"
- keep values on Table if "With Tangential Straightpull Inserts"
Berd Tangential Straightpull Insert
WARNING: never modify even slightly the flanges of Extralite hubs not even their surface finish.
5
Lacing: correct lacing patterns with straight-pull spokes must be tangential, exactly as shown below
(and not as the traditional 2 or 3 crossings used for elbow spokes)
Spoke lacing and tensioning require skills and experience, refer to an expert professional wheel builder for these operations.
Manuals
Spare Parts
Spare Parts
112,17 €
41,74 €
10,43 €
10,43 €
10,43 €
10,43 €
51,30 €
20,00 €
86,09 €
5,22 €
6,96 €
33,91 €
6,96 €
HyperRear2 hubshell 52 g
173,04 €
5,22 €
2,61 €
77,39 €